|
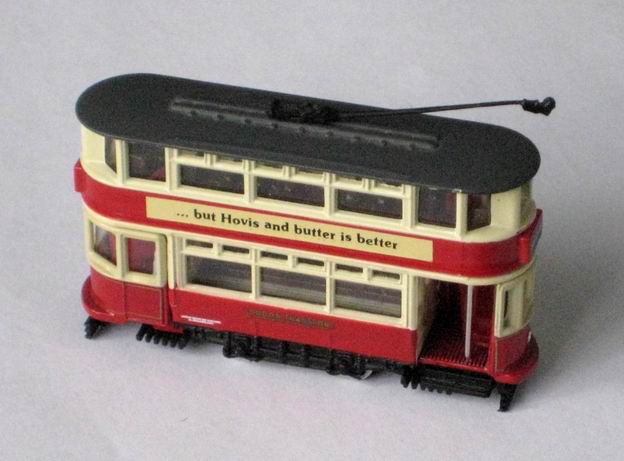
Read here how to motorise the N scale (2 mm / ft) Oxford 4-wheel tram with a 9 mm gauge TU-7T chassis from Plaza Japan for 2-rail operation, with instructions for live overhead operation at the end.
WARNINGThis chassis only accepts a maximum of 4.5 volts so an appropriate low voltage power unit will be essential.
|

|
When the tram is turned upside down there are two rivets, one under each platform, which need to be drilled off to release the plastic base plate.
When the baseplate rivets are released the wheels and axles will fall out, at this stage all parts should be placed in a safe place for use later.
|

|
The next two rivets hold the platforms on to the lower deck; this has the two sets of plastic stairs attached, which are held at the top by a tiny rivet.
The platform glazing and hand rails will fall out and need to be saved for use when rebuilding the tram. The stairs remain attached to the lower deck.
|

|
The last two rivets hold the upper deck and need to be drilled off to remove it.
The stairs should be removed at this point, by cutting off the rivet heads and pulling the stairs out, and kept with the other parts.
The glazing and the seats should also be removed for safe storage and later use.
|

|
The platform casting should be cut where it narrows at the inner ends of the platforms.
The baseplate should be cut at the inner ends of the lifeguards.
|

|
The photo shows the Plaza Japan TU-7T chassis, as supplied, to be installed in the lower deck where it will be fixed in place by the supplied screw through an inverted U-shaped bracket into the top of the arrowed fixing tube.
The distance between the truck sides is 10.7 mm and the chassis is 11.2 mm wide so the wheels should be filed down to about 10.7 mm and the truck sides gently eased out so that there is space between the wheels and truck sides.
|

|
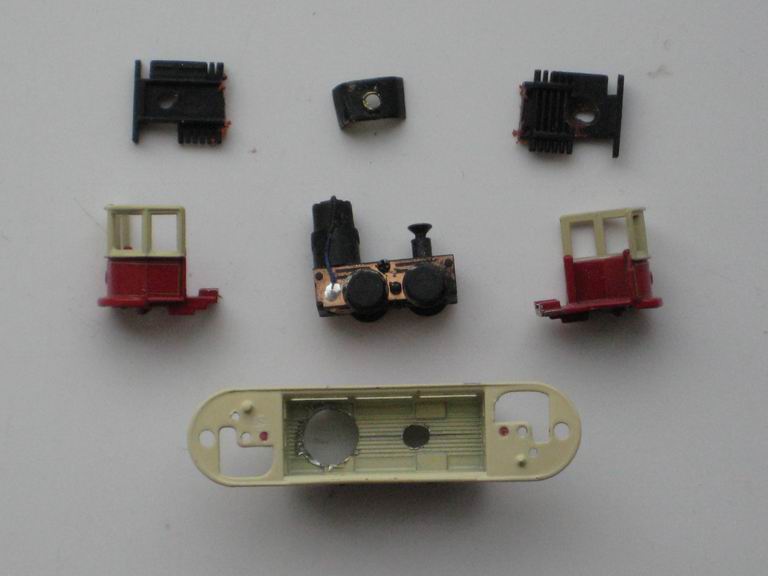
This photo shows all the modified parts including the brass U-shaped fixing bracket (top centre) ready for assembly.
To improve the appearance of the assembled tram, the white top and shiny end of the motor, the brass fixing bracket and the wheel faces should be painted matt black to make them less visible when the tram is running.
The lower deck floor needs have two holes drilled on the centreline, one 5/16 th's inch diameter for the motor and the other 1/8 th inch diameter for the fixing tube.
|

|
The chassis is fixed in place by the supplied screw and home made brass U-shaped bracket shown top centre in the photo above.
The Oxford tram is re-assembled by re-fitting the glazing and fixing all body parts together with impact adhesive and, when set, is ready for two-rail running.
|

|
The upper deck seats can be removed by pulling them out and, as there are no N gauge trolley poles available, the trolley pole will need be replaced with a home made open topped type pole, the same length as the original, made from brass or piano wire with a small wheel soldered on to the end.
|
This is fitted into a brass tube glued into the hole, which may need to be enlarged, in the top deck roof, with a wire attached to go to the motor. A ready made alternative for some tram systems is an N gauge pantograph which can be fixed through the existing trolley pole hole in the roof.
It is a simple operation to convert from 2-rail to live overhead as it just requires a small change to the wiring of the motor. As this motor is sealed, it is necessary to detach one motor wire from the wheel pick-up and attach it, with an extension, to the trolley pole or pantograph and link both pick-ups together with a wire round the end of the chassis.
If your tram runs in reverse when compared to the other trams on your layout then it may be necessary to exchange the platforms if you have provided a driver at the front or to turn the tram round to face the other way if there is no driver present.
Many other N gauge motorised chassis can be found on the Plaza Japan ebay Store website or from John Whitehouse at East Lancs Model Tramway Supplies or by email to sales.elmts@gmail.com.
© Gordon Bulmer 2022


